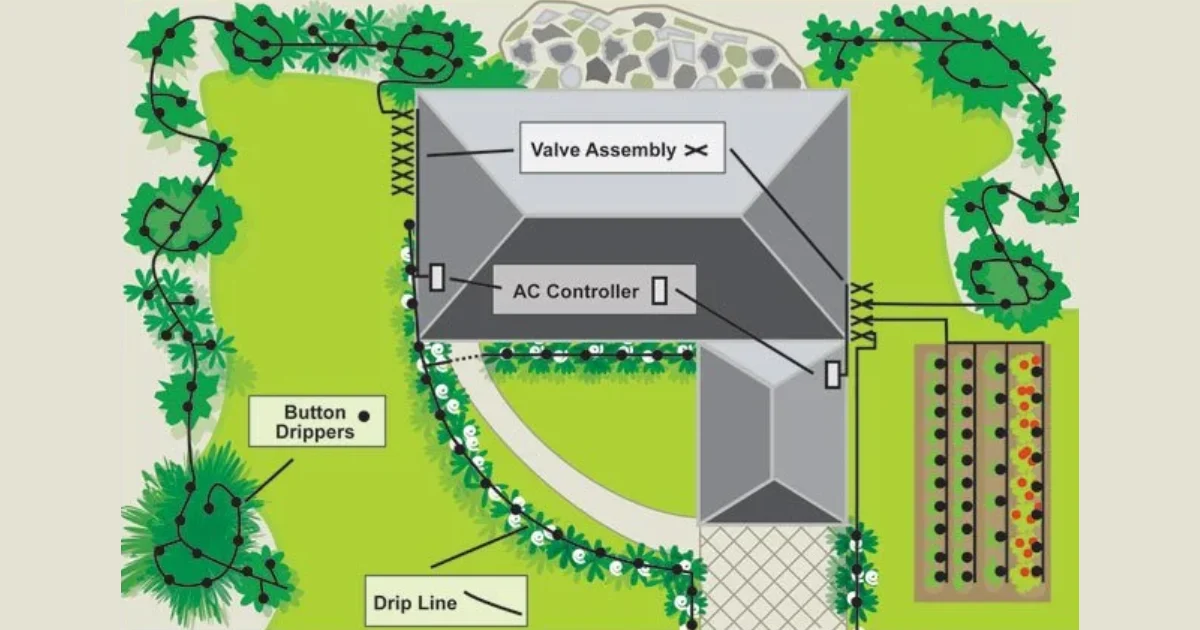
A well-installed underground drip irrigation system offers water directly to plant roots. It reduces waste and improves growth. Professionals know success depends on correct emitter sizing, pressure regulation, and precise zoning. By skipping these, you can end up with uneven watering and costly repairs.
Before you start, plan emitter spacing so every plant gets even coverage. Check water pressure with a gauge before connecting parts. Use UV-resistant tubing for longer life, anchor lines so they don’t shift, and test each zone individually before running the full system.
At Wise Water Works, we bring 30+ years of Houston irrigation expertise. From smart controllers to clean valve box installs, we design systems built for Texas landscapes
A Quick Checklist of Core Underground Drip Irrigation System Installation Workflow
Installing an underground drip system can be overwhelming. Before you dive in, keep this quick checklist handy to stay organized, work efficiently, and avoid costly mistakes.
- Plan layout and group plants by water needs
- Gather all pro-grade tools and UV-resistant materials
- Choose start method: faucet, valve, or riser retrofit
- Lay mainline tubing and secure with stakes
- Install drippers/emitters matched to soil and plant type
- Flush each zone before capping
- Test system, adjust flow, and reposition emitters
- Cover tubing, protect exposed areas, and mark the emitter point
How To Install Underground Drip Irrigation System
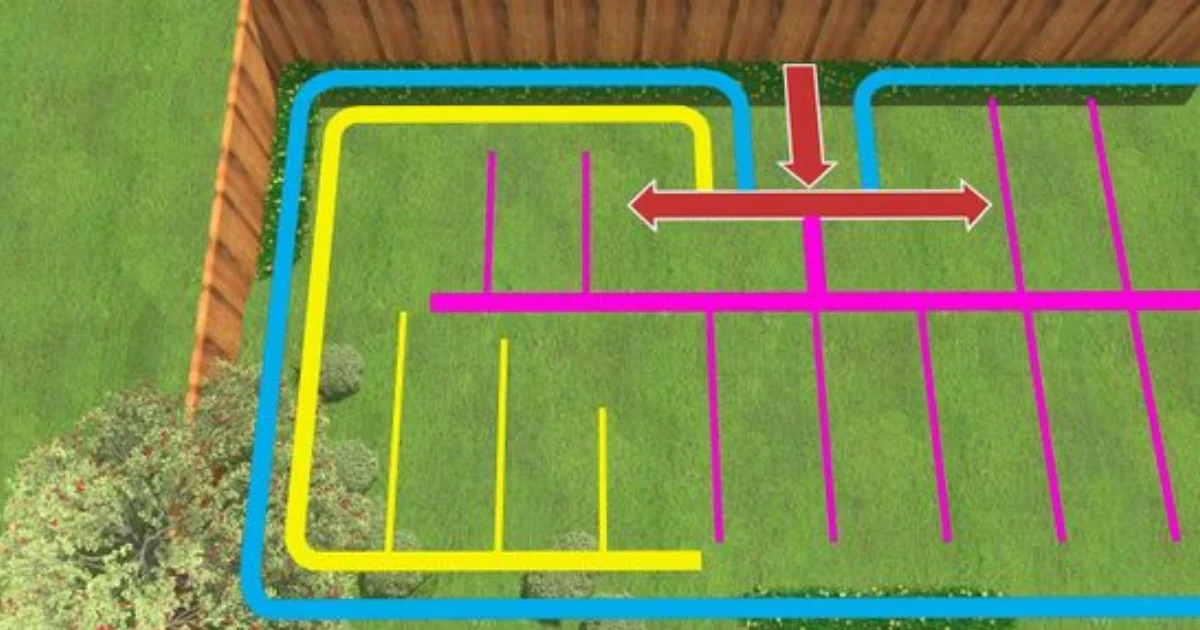
Now we will walk you through installing an underground drip irrigation system, step by step, so you can achieve professional-level results with consistent watering and long-lasting performance.
Step 1: Plan Your Layout
i) Confirm plant groups and water demands
Start by dividing plants into irrigation zones by water requirements. High-demand zones (vegetables, annuals) get separate circuits from drought-tolerant plants. Grouping reduces system strain and balances pressure.
ii) Conduct a detailed site survey
Walk the site with a measuring wheel and slope meter. Flag all planting beds, noting sun exposure and slope grades over 5%. These affect emitter selection and spacing.
iii) Locate and evaluate water source
Identify your water supply point, hose bib, irrigation valve, or repurposed sprinkler line. Measure static pressure with a gauge. Pressure above 50 PSI means a regulator is mandatory. Confirm flow rate to size the mainline and valves properly.
iv) Sketch a precise layout
Draft a scale drawing including plants, water source, pipe runs, and valve locations. Plan tubing runs less than 200 ft per zone. If needed, design loops or multiple manifolds for pressure management and future expansion.
Soil Type Influences Emitter Choice
Quick field test: grab soil and feel moisture retention. Use this to calibrate emitter flow and spacing:
| Soil Type | Field Clues | Emitter Flow | Spacing |
| Sandy | Crumbles fast, drains quickly | 2 GPH | 10–12″ |
| Loamy | Holds form, breaks apart easily | 1 GPH | 16–18″ |
| Clay | Sticks, forms, clumps | 0.5–1 GPH | 18–24″ |
Step 2: Gather All Tools and Materials
Gather key tools and materials upfront. This saves time and prevents costly mistakes on site.
Essential Tools
- Tubing Cutter
- Hole Punch
- Measuring Tape
- Shovel or Trencher
- Pipe Wrench or Adjustable Wrench.
- Wire Stripper
- Garden Stakes
- Teflon Tape
Core Materials
- Polyethylene tubing (½” mainline and ¼” micro tubing)
- Emitters matched to plant needs
- Connectors: tees, elbows, couplers
- Backflow preventer (code required)
- Pressure regulator (if pressure exceeds 40 PSI)
- Filter to protect emitters from debris
- End caps or flush valves for tubing ends
- Irrigation controller (manual or smart)
- Direct burial wire for valve connections
Step 2: Choose a Start Method That Fits Your Setup
Your choice here affects system longevity, ease of maintenance, and water delivery efficiency. Consider your site’s infrastructure and watering goals before picking a method.
Option A: Faucet Connection
This method taps directly into a standard outdoor faucet using a simple hose adapter. It suits smaller, temporary, or seasonal drip setups. Expect low water pressure and manual control unless paired with a timer. Choose this if you lack irrigation valves or want a cost-effective, no-plumbing-start solution.
Option B: Irrigation Valve Hookup
This start method connects your drip system downstream of existing irrigation valves, controlled by an automatic timer or smart controller. It allows precise scheduling and multiple watering zones. Use it for permanent installations or larger landscapes. Ensure valve compatibility and install pressure regulators to protect drip tubing from high water pressure.
Option C: Sprinkler Riser Retrofit
This method is a smart choice if you’re upgrading an existing sprinkler system. You simply swap out the sprinkler heads on the risers for drip adapters. It’s quick and avoids digging new trenches or replacing pipes. This works great when your sprinklers are spaced for grass but you want to switch to drip watering for plants.
Step 3: Lay and Install the Tubing
With your layout planned and start method selected, you’re ready to position the mainline tubing. Proper placement now saves time in emitter installation and prevents future system issues.
Installation steps:
- Unroll ½-inch polyethylene tubing along the mapped path from Step 1.
- Keep running under 200 feet to maintain even pressure.
- Avoid dragging tubing over rough surfaces to prevent cuts.
- Stake every 2–3 feet to hold position.
- Cut tubing with a sharp cutter for clean, leak-free joints.
- Add elbows and tees for corners or branches.
- Leave slight slack for temperature-related expansion.
- Keep ends open for flushing before sealing.
Step 4: Install Drippers and Emitters
With the mainline secured, you can now connect the water delivery points. Correct emitter placement and selection ensure plants receive the right amount of water without waste.
Installation steps:
- Use a drip punch tool to create clean holes in the mainline tubing.
- Position holes near the plant’s root zone, not directly against stems or trunks.
- Insert barbed emitters firmly to prevent leaks.
- Match emitter flow rate to plant needs and soil type (0.5 GPH for clay, 1 GPH for loam, 2 GPH for sand).
- Install multiple emitters evenly around the canopy edge for trees or large shrubs.
- Use ¼-inch distribution tubing to reach plants away from the mainline.
- Secure all lines with stakes to keep emitters in place.
- Keep emitters accessible for seasonal maintenance or replacement.
Step 5: Flush and Cap the System
Before sealing the tubing, run water through each line to remove dirt, plastic shavings, and debris from installation. Keep all tubing ends open and let the water run until it flows clear. This step prevents early emitter clogging and uneven flow.
Once flushed, install end caps or flush valves at every line termination. For longer runs, choose removable flush valves to clean the system during seasonal maintenance. During this process, check all connections for leaks and tighten or reseate fittings as needed. Proper flushing and sealing now will extend system life and keep water delivery consistent.
Step 6: Start Watering and Adjust
Turn on one zone at a time to monitor pressure and flow. Always start with the farthest emitter, checking for weak output or air pockets. Walk the full line and confirm every emitter is dripping evenly without misting or spurting. Adjust placement so water lands directly in the root zone, not on leaves or bare soil.
Fine-tune emitter flow rates for plant type and soil conditions, trees may need double the points compared to shrubs. Program your irrigation controller in short cycles at first, increasing duration based on seasonal demand. Make all adjustments before adding mulch, so tubing remains visible for final inspection.
Step 7: Automate and Maintain
Once adjustments are complete, cover the tubing to protect it from sunlight, foot traffic, and temperature swings. Use mulch, decorative rock, or soil, keeping at least two inches of cover for UV protection. Avoid burying tubing deep, drip lines need seasonal access for flushing and repairs.
Leave all emitter points visible or marked with flags so you can locate them quickly in the future. Around trees and shrubs, keep mulch pulled back a few inches from the trunk to prevent rot. In high-traffic areas, use protective sleeves or conduit over exposed sections to prevent crushing or cuts. This step locks in system longevity before regular use begins.
Troubleshooting Common Problems While Installing an Underground Drip Irrigation System
You’ll encounter issues that slow progress or reduce efficiency during installation and maintenance. Knowing the causes and fixes upfront saves time, prevents callbacks, and keeps your drip system running flawlessly.
1. Wrong Emitter Flow Rate
While running your project, you might notice some plants looking soaked and others bone dry. That’s usually a flow mismatch. High-flow emitters overwhelm delicate roots, and low-flow ones can’t meet thirsty plants’ needs. Match GPH to plant type, soil, and zone runtime before installation.
2. Poor Zoning by Plant Needs
Midway through a job, you might realize a cactus is sharing a line with lettuce. That’s a zoning error. Mixing high- and low-water plants forces you to overwater or underwater something. Create zones grouped by plant type and water demand.
3. Skipping Filter and Pressure Control
If your new system starts spitting water from joints or losing output at emitters, check for missing filter or regulator. Debris clogs and excess PSI burst fittings. Always install a mesh filter before the mainline and regulate pressure to 15–30 PSI.
4. Tubing Memory and Misalignment
Laying tubing that keeps springing out of place? That’s a coiled memory. If you skip unrolling it in the sun first, alignment suffers. Warm the tubing, stake it every 2–3 feet, and avoid sharp bends to keep emitters in position.
5. Uneven Flow on Slopes
When working on a hillside, you might see downhill emitters flooding and uphill ones barely dripping. That’s gravity at work. Use pressure-compensating emitters or break the slope into separate zones for even water delivery.
Expert Maintenance Tips for Underground Drip Irrigation
- Flush lines seasonally – Before peak watering, open every end cap and run at full pressure for 3–5 minutes. This clears sediment that settles in low spots underground.
- Check pressure at the farthest emitter – Place a pressure gauge on the last outlet in a run. If PSI drops more than 10–15% from the start, look for pinched tubing or partial blockages.
- Rotate emitter positions yearly – Move emitters around the root zone a few inches. This prevents roots from clogging ports and keeps water reaching new root growth.
- Inspect buried connections after heavy rains – Soil shifts can pull fittings apart or loosen clamps. Gently uncover suspect joints and re-seat them before leaks become larger.
- Use vinegar flush in hard-water regions – Every 6–8 months, run a diluted vinegar solution (1:4 ratio) through each zone for 30 minutes to dissolve mineral buildup inside emitters and tubing.
In Closing
Installing an underground drip irrigation system takes planning, precision, and the right techniques to deliver water exactly where plants need it. Following each step, from layout design to final testing, creates an efficient, low-maintenance setup that saves water and promotes healthier growth.
Whether you tackle it yourself or want expert installation, the goal is a system that performs season after season. At Wise Water Works, we bring over 30 years of irrigation expertise to Houston landscapes. Contact us today to get your custom system built right the first time.
Frequently Asked Questions
Question: How deep should underground drip tubing be buried?
Answer: For most landscapes, bury tubing 6–8 inches deep. This protects it from sunlight, temperature swings, and surface damage, while still keeping it accessible for future repairs.
Question: Can I connect an underground drip to my existing sprinkler system?
Answer: Yes, using a sprinkler riser retrofit kit. It replaces a spray head with a drip connection and includes a pressure regulator and filter for proper operation.
Question:How often should I flush an underground drip system?
Answer: Flush each zone at least twice a year. Quarterly flushing prevents clogging in areas with heavy sediment or hard water and maintains even flow.
Question: What type of emitters work best underground?
Answer: Use pressure-compensating, self-flushing emitters. They maintain consistent output across slopes and reduce clogging risks from debris or mineral buildup inside the lines.